Authentification unique et SCIM (Enterprise)
Laissez votre équipe se connecter à FolianX avec votre fournisseur d'identité, et provisionnez ou déprovisionnez les membres automatiquement. SAML 2.0 pour l'authentification unique, SCIM 2.0 pour le cycle de vie des utilisateurs. Les captures ci-dessous utilisent JumpCloud ; Okta, Microsoft Entra ID et tout fournisseur SAML/SCIM suivent le même schéma.
Single sign-on and SCIM are on the Enterprise plan. You configure them from Settings → SSO, and everything you paste into your identity provider (IdP) comes from that same page.
Avant de commencer
- Votre organisation est sur l'offre Enterprise.
- Vous êtes administrateur de votre organisation FolianX.
- Vous pouvez administrer votre IdP (créer une application SAML, gérer les utilisateurs et les groupes).
Partie 1 — Authentification unique (SAML)
1. Créez une application SAML dans votre IdP
In JumpCloud, go to SSO Applications → Add New Application → Custom Application, then enable Manage Single Sign-On (SSO) with Configure SSO with SAML. (Tick Export users to this app too if you also want SCIM provisioning — Part 2.)
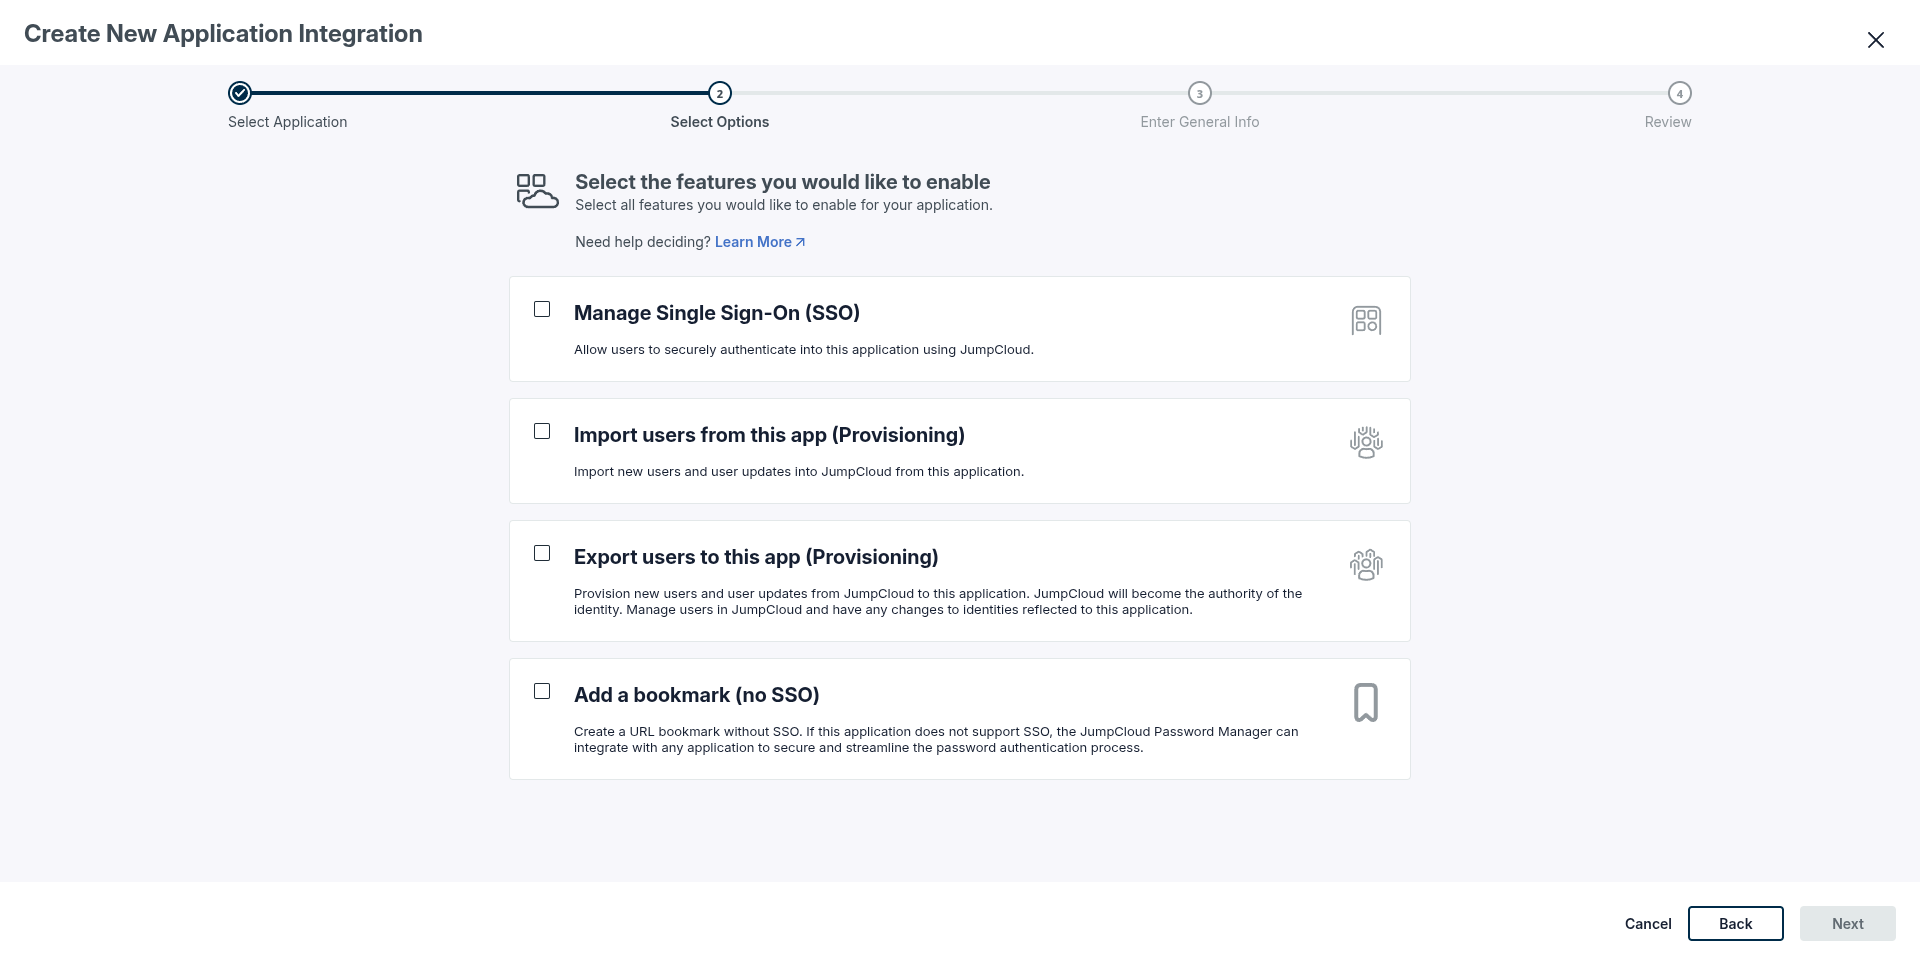
2. Faites pointer l'application vers FolianX
L'URL de l'Assertion Consumer Service (ACS) de FolianX est :
https://folianx.com/sso/saml/acsEnter a value of your choice for the SP Entity ID (for example folianx) — you'll
put the same value into FolianX in step 5, so the two sides agree.
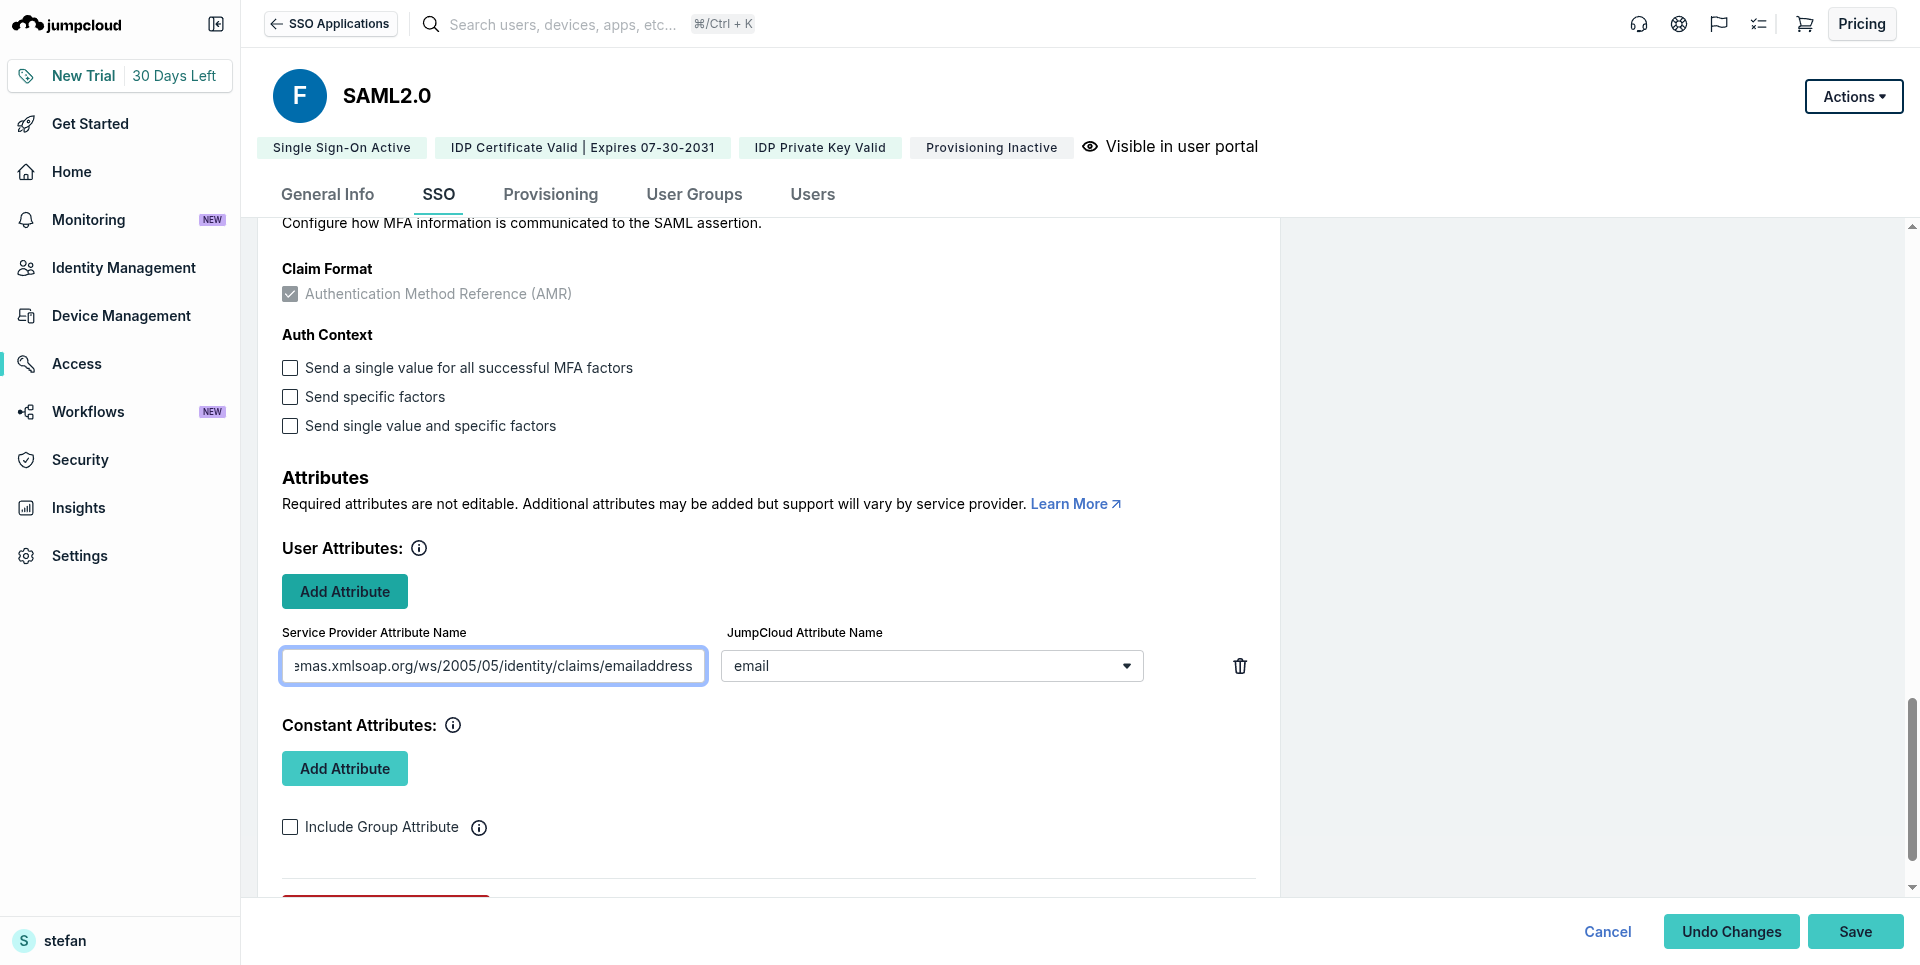
3. Réglez le sujet, le format et — surtout — la signature
- SAML Subject NameID :
email - Format du NameID :
urn:oasis:names:tc:SAML:1.1:nameid-format:emailAddress - Associez l'attribut e-mail à
http://schemas.xmlsoap.org/ws/2005/05/identity/claims/emailaddress.
Sign the assertion, not just the response. FolianX requires the SAML assertion itself to be signed. Set Sign to Assertion and Response (or at least Assertion). If you leave it on the default Response only, login fails with “SSO authentication failed: invalid response.”
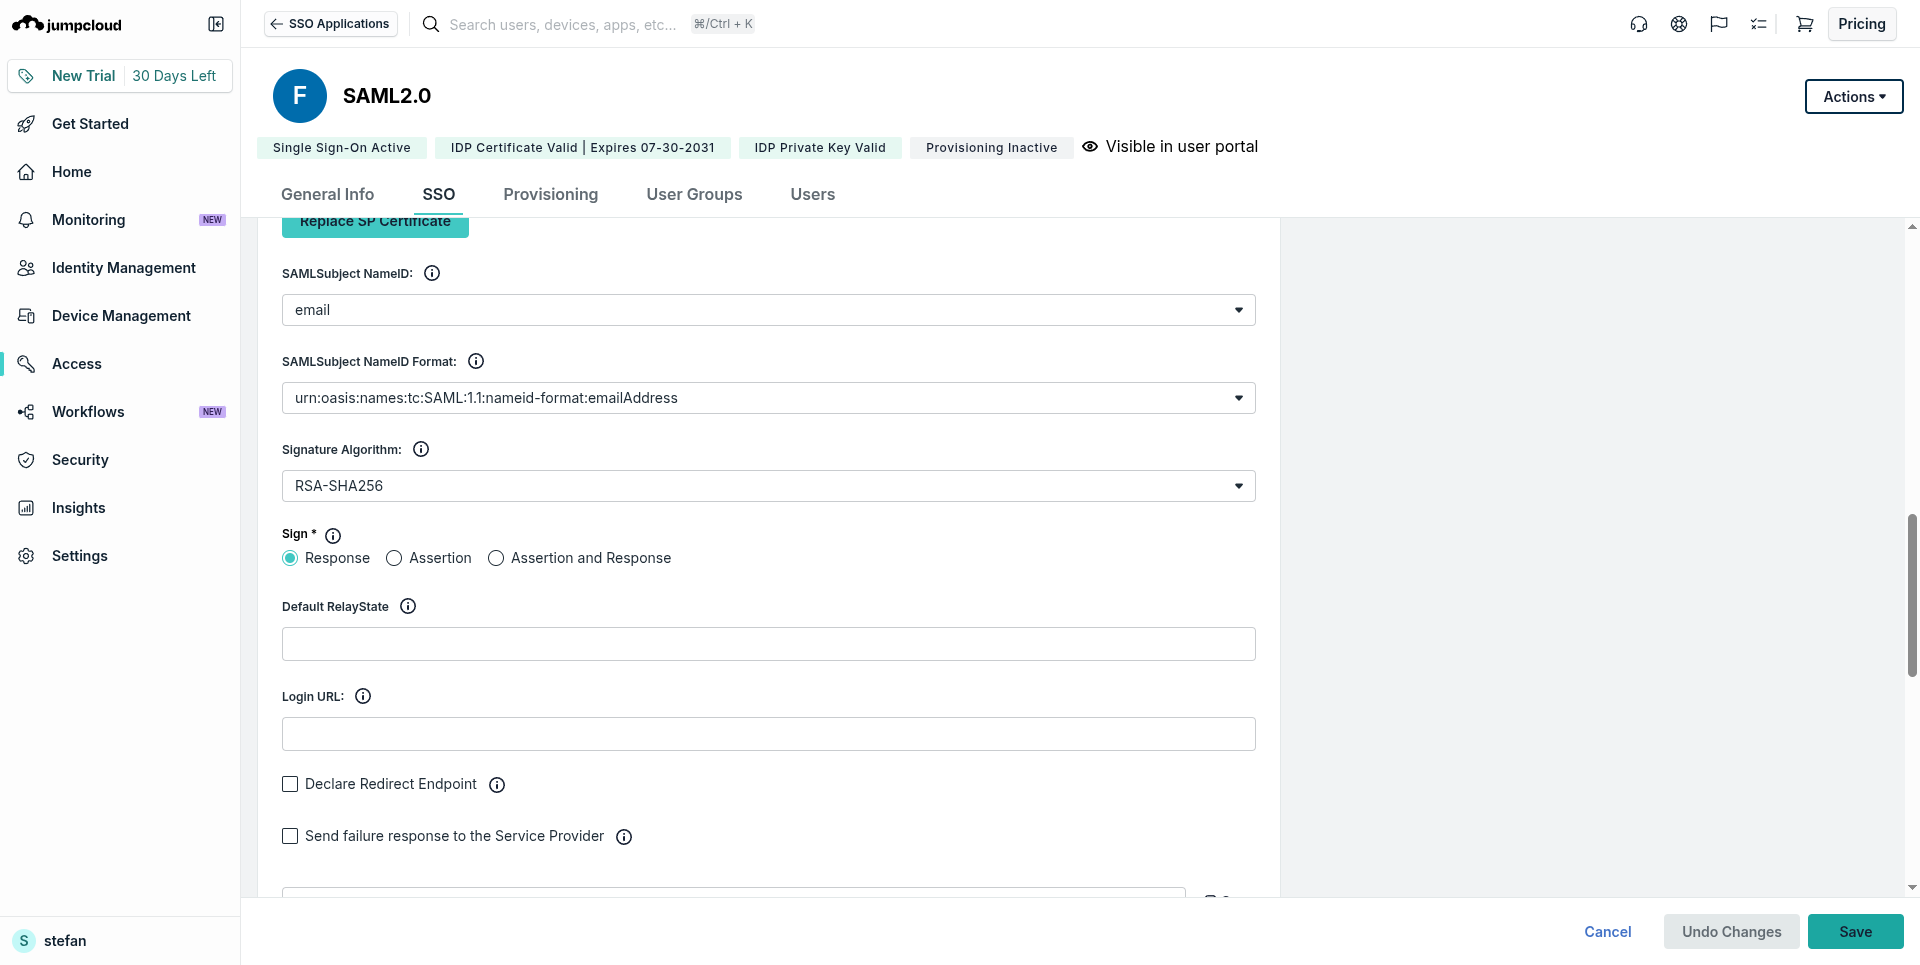
email, format emailAddress, et Sign → Assertion and Response.4. Affectez vos utilisateurs
In JumpCloud, users get access to an application through a user group: create a group, add your members, and bind the group to the app on its User Groups tab.
5. Configurez le SSO dans FolianX
Exportez les métadonnées IdP de votre application et copiez trois valeurs dans Paramètres → SSO de FolianX :
- IdP Entity ID — l'IdP Entity ID de l'application.
- IdP SSO URL — l'URL de connexion SSO de l'application.
- Certificat IdP X.509 — le certificat de signature, au format PEM.
Set the SP Entity ID to the same value you chose in step 2, then click Configure SSO.
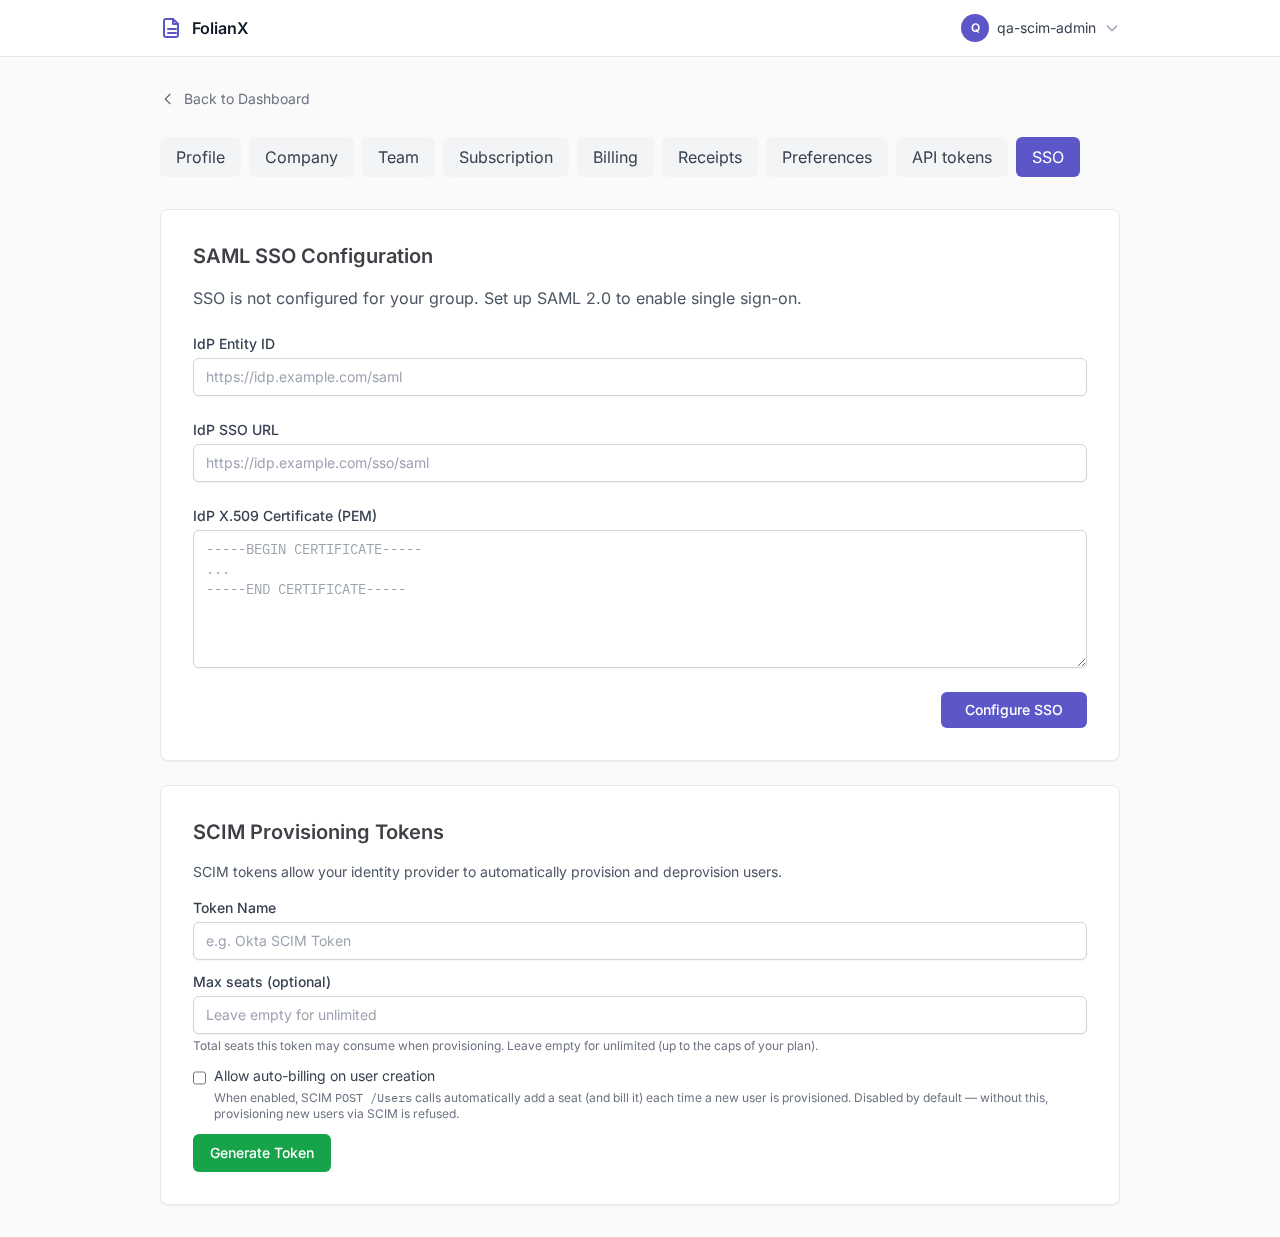
6. Activez le provisionnement Just-in-Time
Once the config is saved, tick Enable Just-in-Time user provisioning so a member who signs in for the first time gets a FolianX account automatically. Because a new member consumes a seat, you must also tick Auto-bill JIT-provisioned users — otherwise an unknown SSO user is refused with “Your account has not been provisioned.”
C'est tout — un utilisateur rattaché peut désormais se connecter via votre IdP et arriver directement dans son espace de travail.
Partie 2 — Provisionnement automatique (SCIM)
SCIM lets your IdP create, update and deactivate FolianX members automatically, so joiners and leavers are handled in one place.
1. Générez un jeton SCIM dans FolianX
On Settings → SSO, in SCIM Provisioning Tokens, give the token a name, optionally set a max seats cap, and tick Allow auto-billing on user creation so provisioned users can claim a seat. Click Generate Token — the token is shown once, so copy it immediately.
2. Ajoutez le provisionnement dans votre IdP
On the app's Provisioning tab, choose SCIM API with Bearer token authentication and enter:
- URL de base :
https://folianx.com/scim/v2 - Token Key : le jeton SCIM que vous venez de générer.
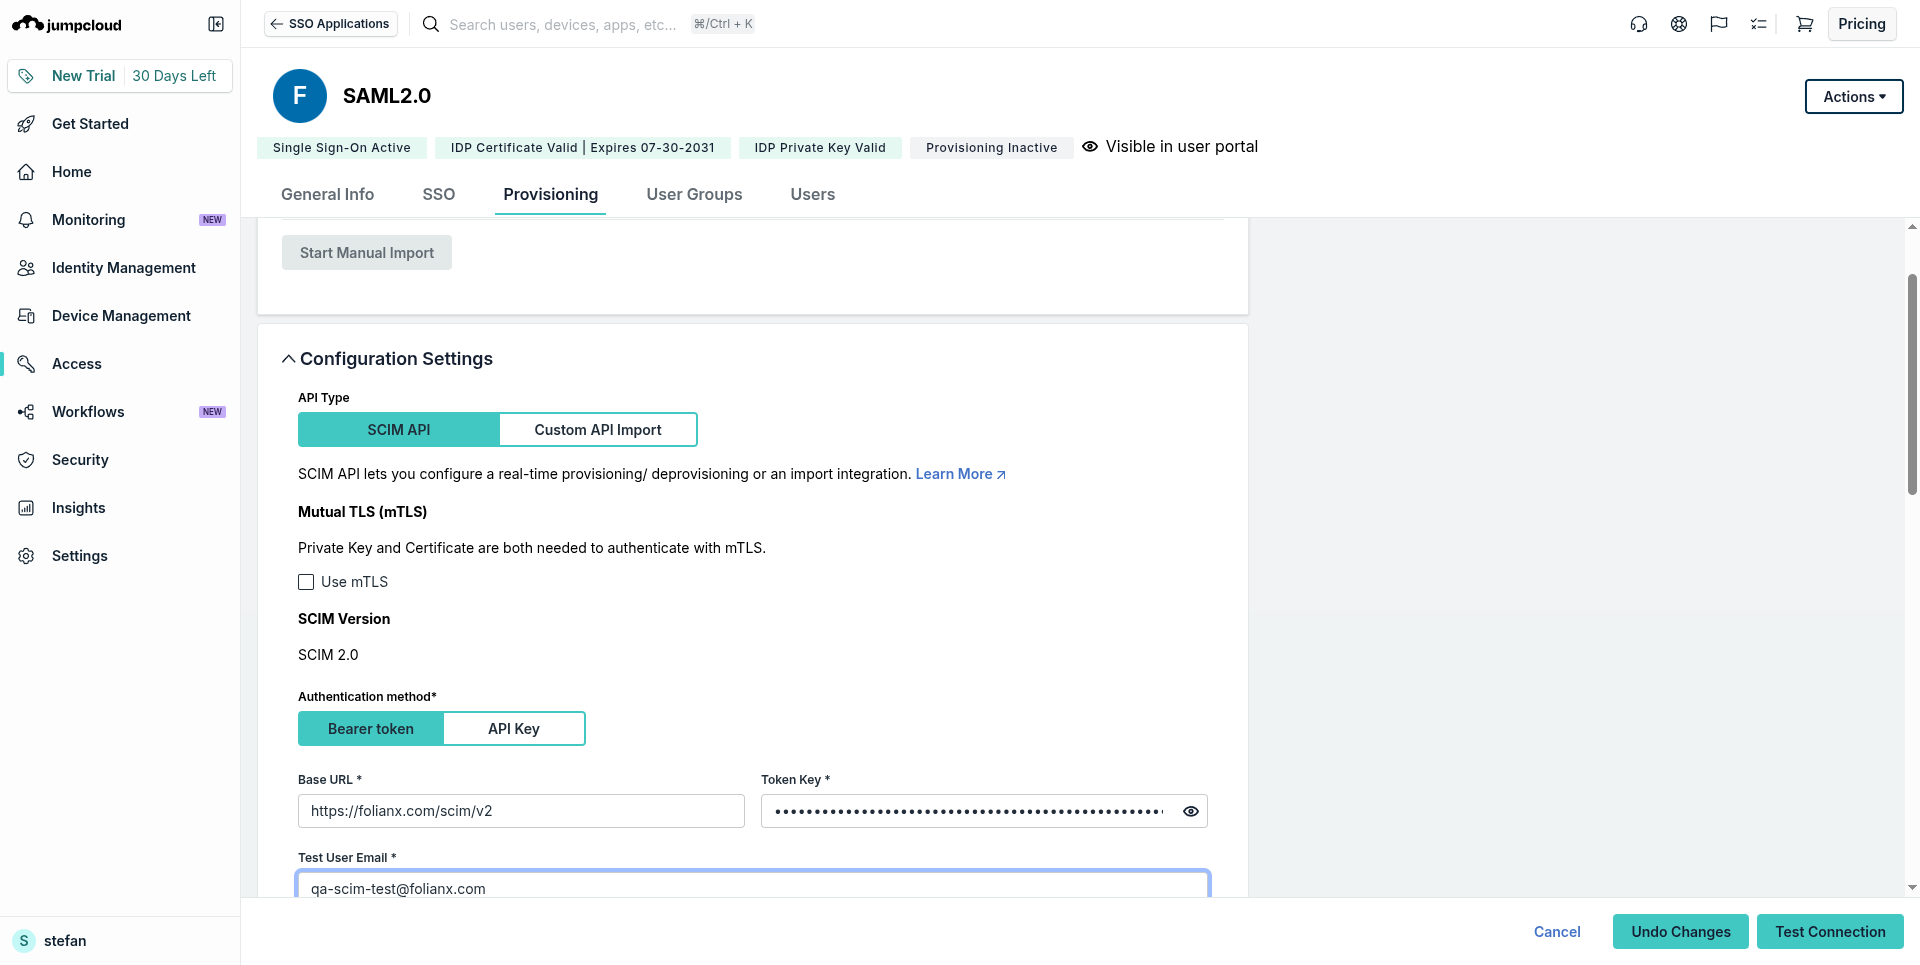
https://folianx.com/scim/v2 et bearer token.3. Testez et activez
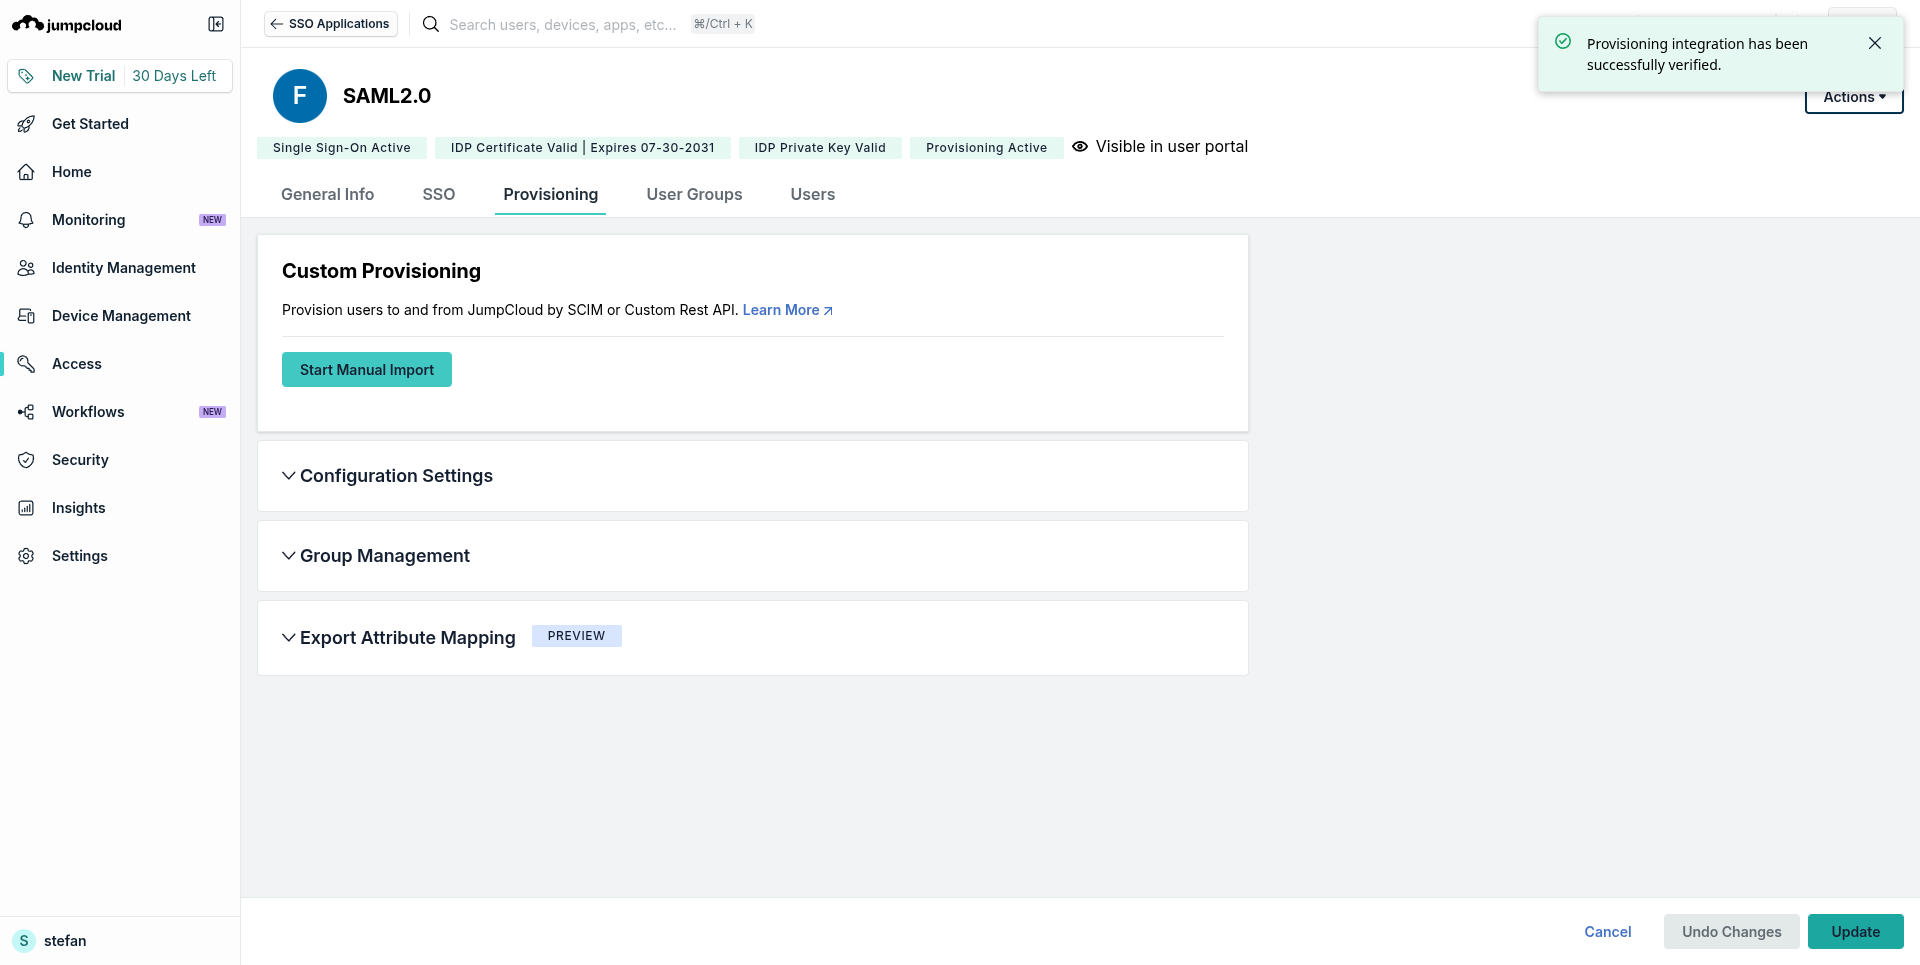
Run Test Connection; once it passes, Activate. Provisioning then goes live — members added to the app in your IdP are created in FolianX, updates flow through, and removing a member deactivates their FolianX account.
Dépannage
| Symptôme | Solution |
|---|---|
| « SSO authentication failed: invalid response ». | Réglez l'IdP pour qu'il signe l'assertion (voir l'encadré de l'étape 3) et vérifiez que le SP Entity ID concorde des deux côtés. |
| « Your account has not been provisioned ». | Activez Auto-bill JIT-provisioned users dans la configuration SSO, ou invitez l'utilisateur depuis Paramètres → Équipe. |
| « Test Connection » SCIM échoue | Vérifiez que l'URL de base est exactement https://folianx.com/scim/v2, que le jeton est à jour et qu'il a l'auto-facturation activée, avec de la marge sous son plafond de sièges. |
Toujours bloqué ? Contactez-nous — précisez votre IdP et l'erreur exacte, nous vous aiderons.